Before proceeding, make sure you have previously uploaded from the File Manager section all the content you want to publish. Not sure how to upload content? See the dedicated guide.
Access the Smart Slider panel from Dashboard.
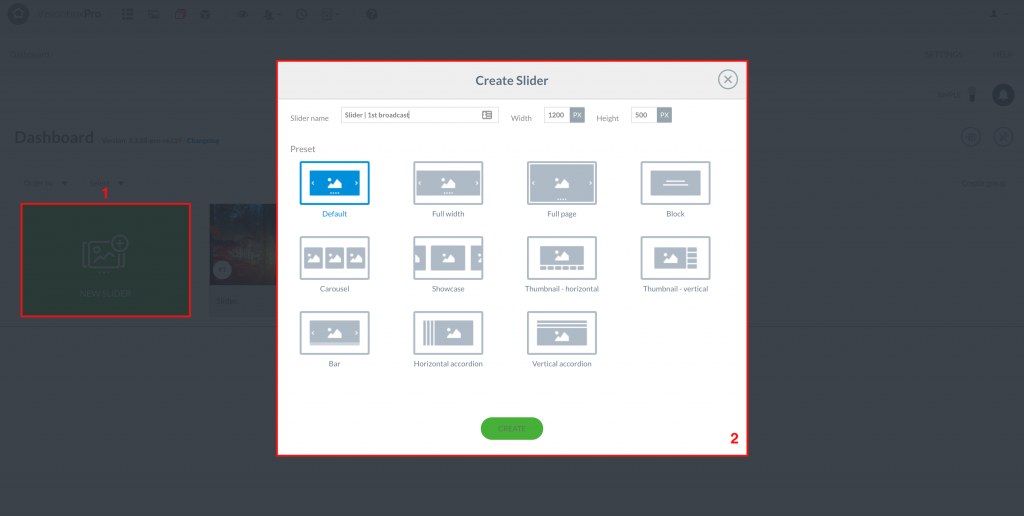
Create your Slider by clicking on New Slider and enter title and dimensions that are indicated in the position of the Template you have chosen and that can host “Smart Slider 3” Module.
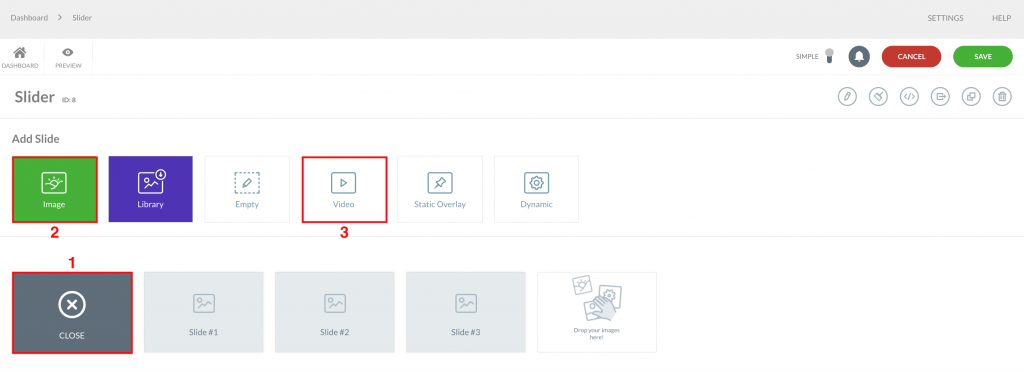
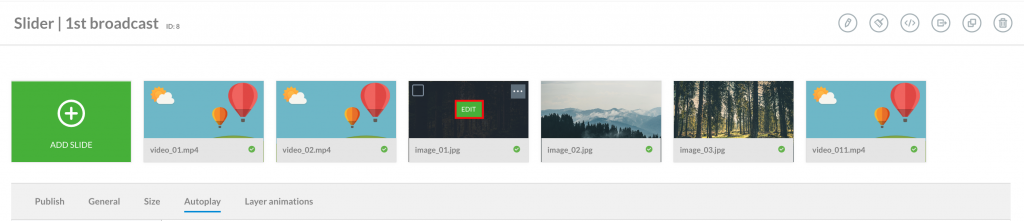
Once you’ve created your Slider, you can insert the Slides you want to view one by one. You can add contents you previously uploaded to File Manager by clicking on the Add Slide button (1), or use the Drag & Drop function (2). Click on Image to start adding your image Slides (3) and on Video to start adding your video Slides (4).
Here’s your mixed content Slider with your image and video Slides.
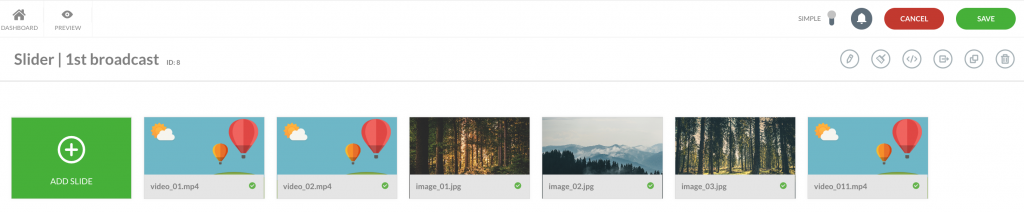
Image Slides
Clicking on Edit (you find it passing with mouse over the image) you can make changes to your image Slides.
From Settings, you can change the Title of your Slide (1) and set up a length of time Slides stays on the Monitor (2). Then click on Save (3) to apply changes.
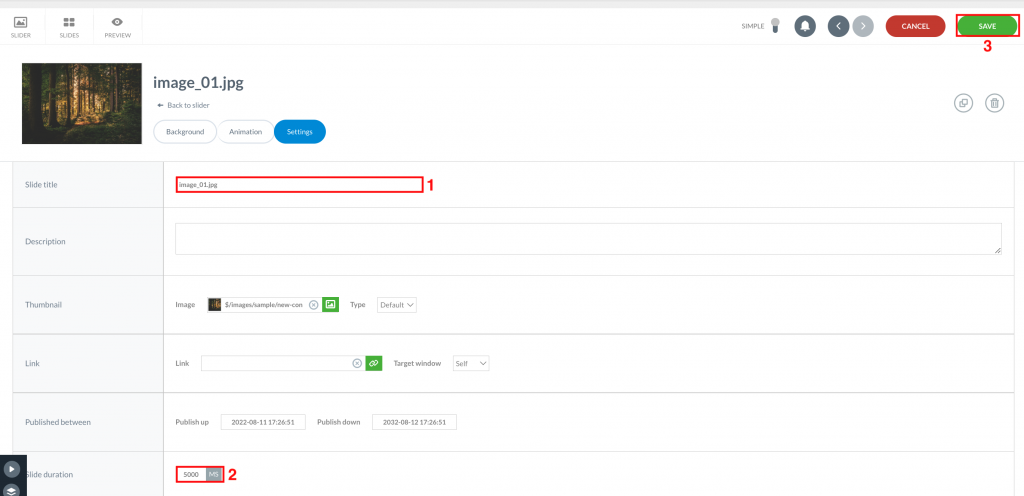
Remember: Slide length will add up to the interval between one Slide and another (see “Interval“). The length of images must be specified for each image Slide that will be added.
Video Slides
Clicking on Edit (you find it passing with mouse over the image) you can make changes to your video Slides.
From Settings, you can change the Title of your Slide (1).
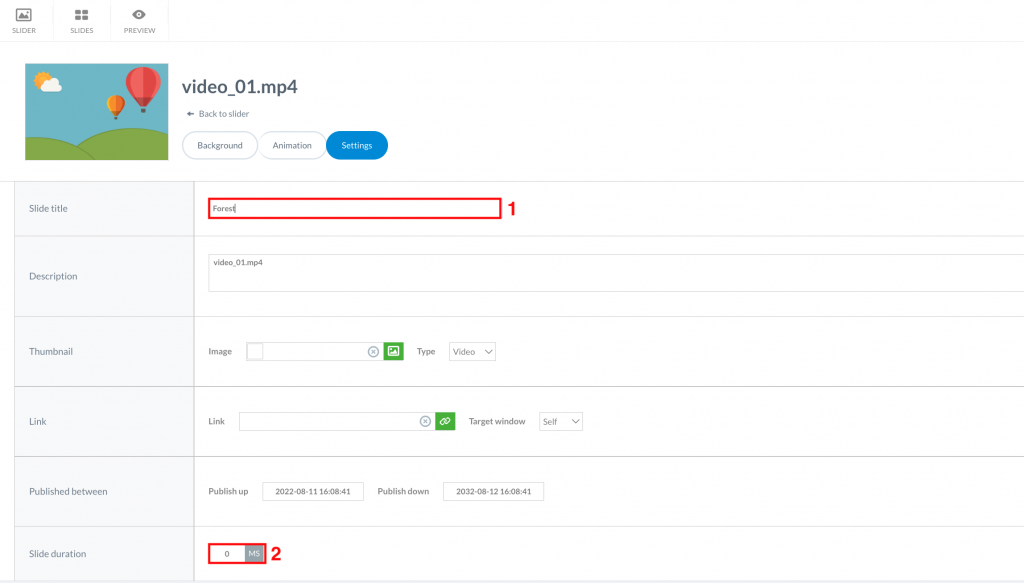
Note: unlike image Slides, the duration is not set for video slides (0 ms). In this case, the system automatically recognizes the length of the entire video (2).
Scroll down the page and click on the video icon to enable/disable some features on the video.
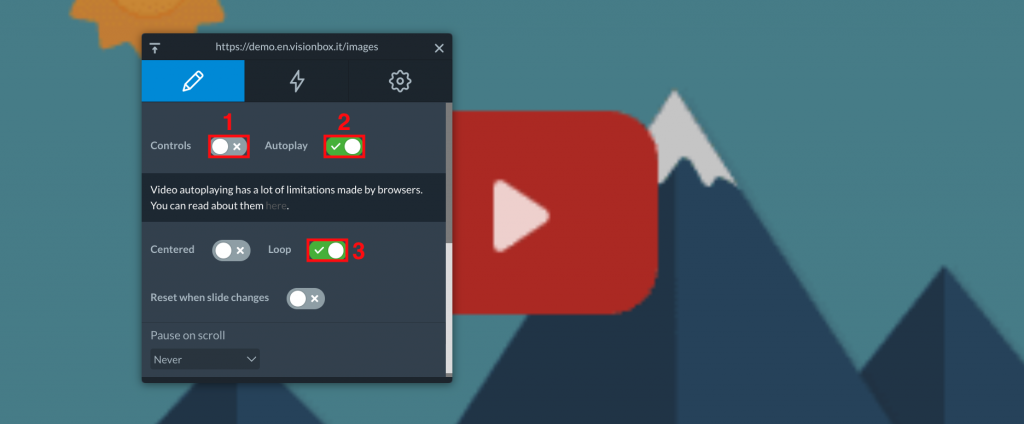
You have to disable the Controls button (1) and enable Auto Play (2) to ensure your video will play automatically.
Note: the Loop button (3), allows the cyclical reproduction of your video slide. We recommend you to enable it only if there is just one video inside your Slider.
Once the features described above have been enabled/disabled, click on Save to apply changes.
Other changes that you can make on your Slide are:
- Move them to decide the order in which they will be displayed
- Duplicate them
- Delete them or move them from one Slider to another
- Choose to publish or not your Slide.
Click on Save to apply the changes made to your Slider.
To ensure that your Slider will be displayed, you have to enable automatic playback. Click on Auto Play in the toolbar (1) and then on Enable (2). Using Interval field (3), you can set a time interval that will go from one slide to the next.
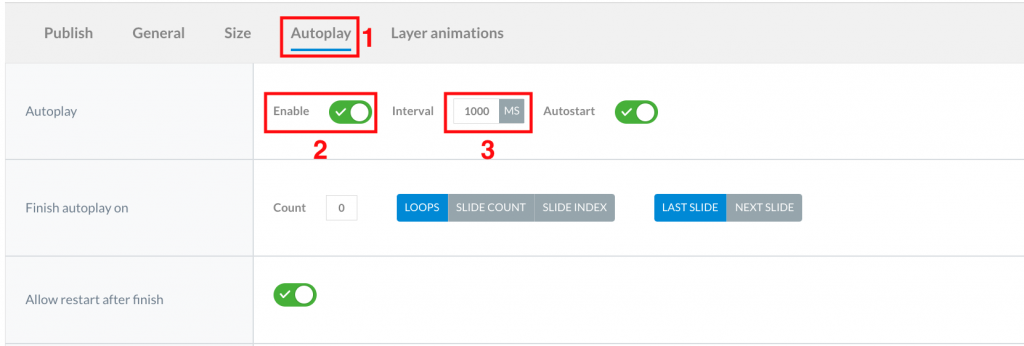
Tip: before moving to the next Slide, the last frame of the video currently playing will be shown on the screen for the entire length of the interval. We recommend using a relatively low time interval (around 1000ms).
Now that you have made all your changes, you can view the preview of your Slider by clicking on Preview.
Remember: you will need to perform this procedure for all the video Slides inside the Slider!