In this guide, we’ll see how to create a simple touch experience based on the link show in the image below. We use an image Slide, a video Slide, a lightbox and a Slide with some text.

Access the Smart Slider panel from the Dashboard.
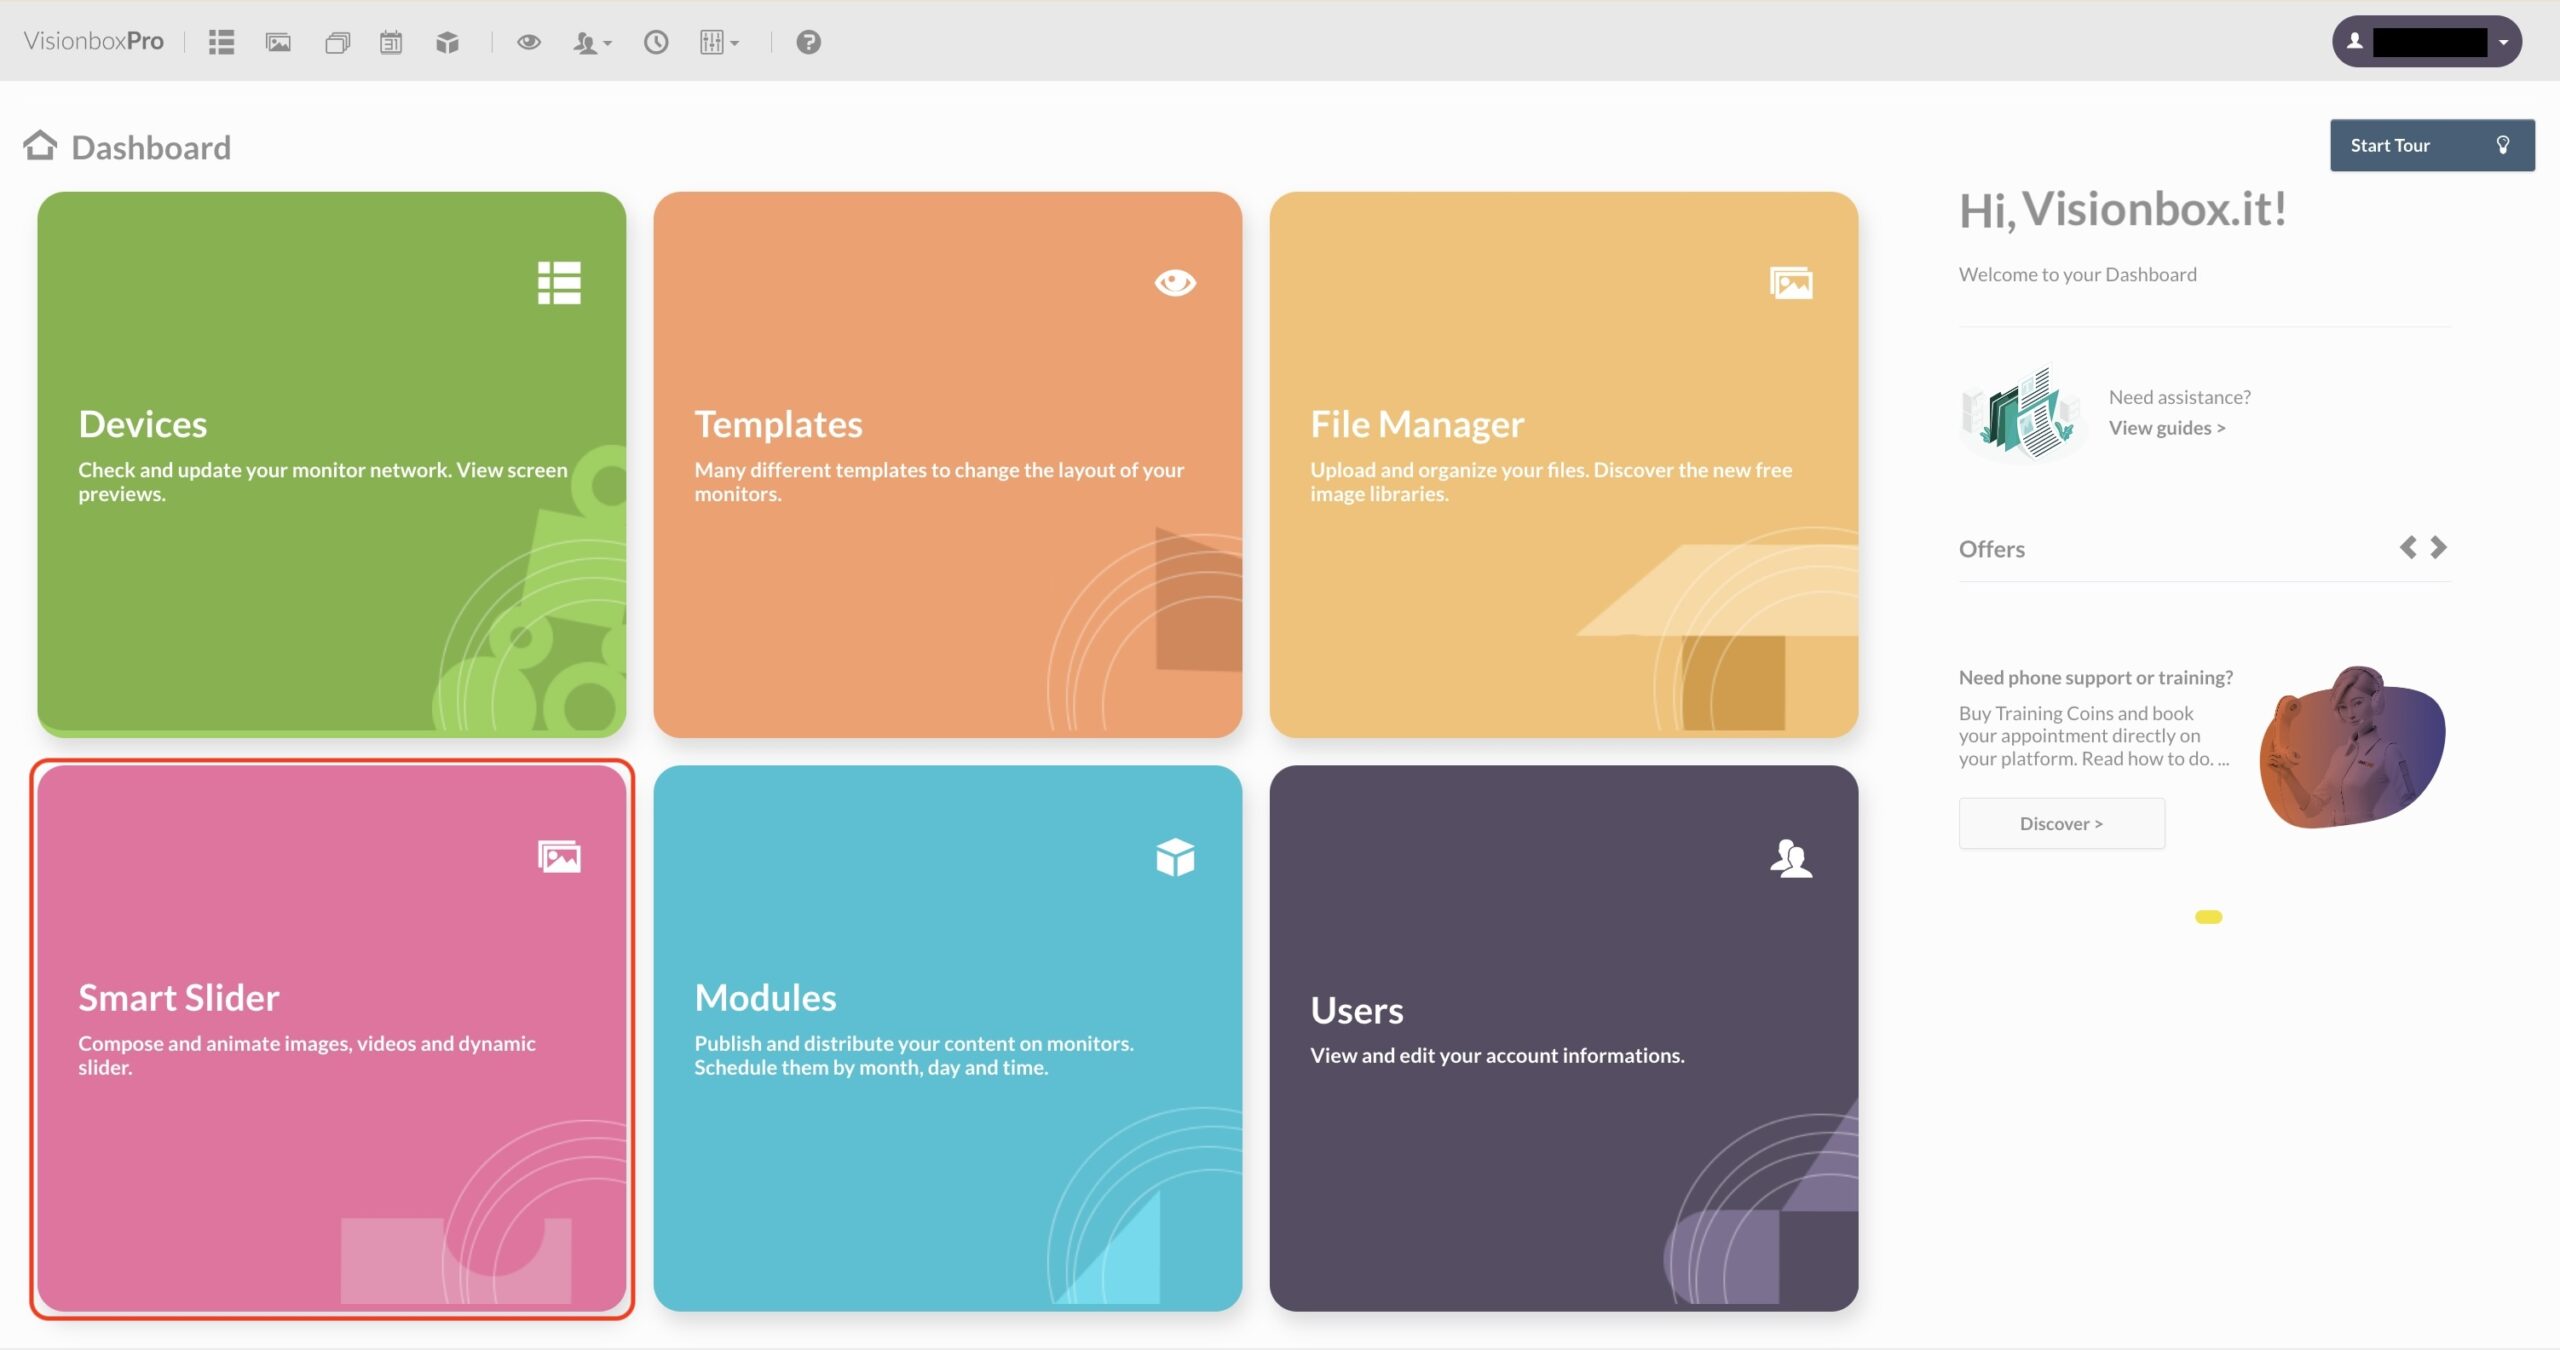
Click on New Slider.
In the pop-up menu that appears insert the Slider title (for example Experience Touch) and the dimensions. They must be the same as the template you choose. Then, click on Create.
Tip: to be sure to insert the right dimensions, open the Dashboard in a new browser tab and open the Devices panel. Click on the name of your template. It appears an image with height and width of all the positions available in that Template.
Once you create the Slider, go on with the creation of the Slide which will become the menu of your touch experience.
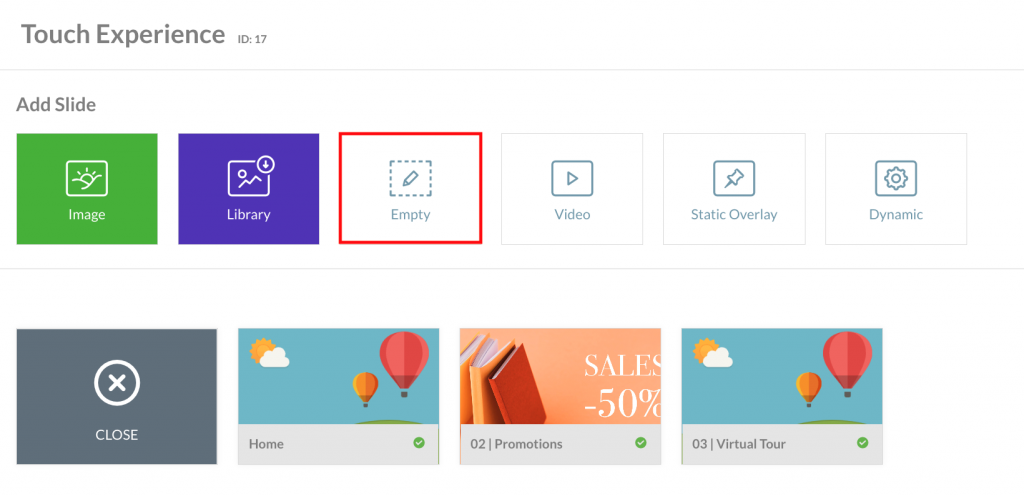
Click on Add Slide and then on Empty.
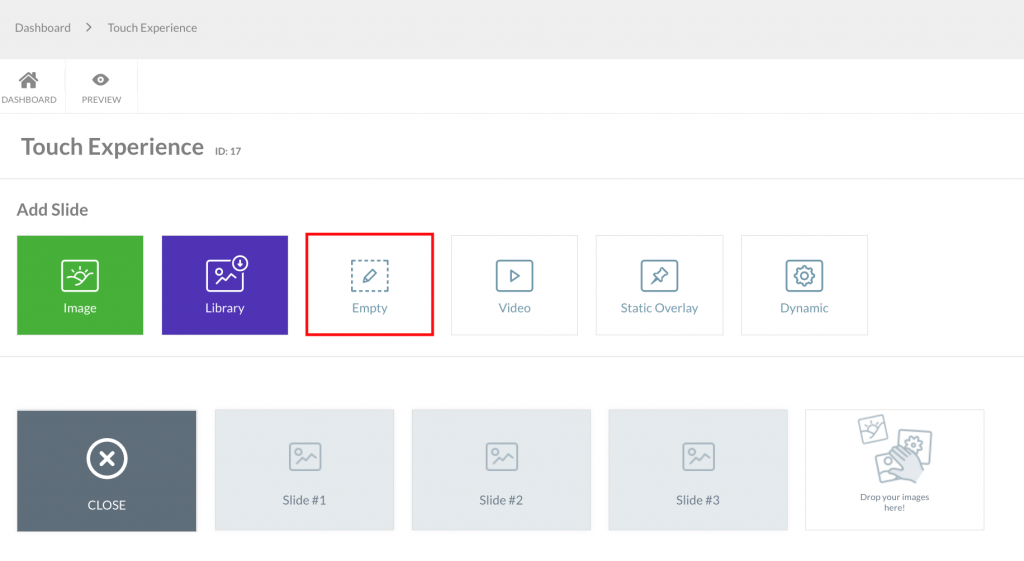
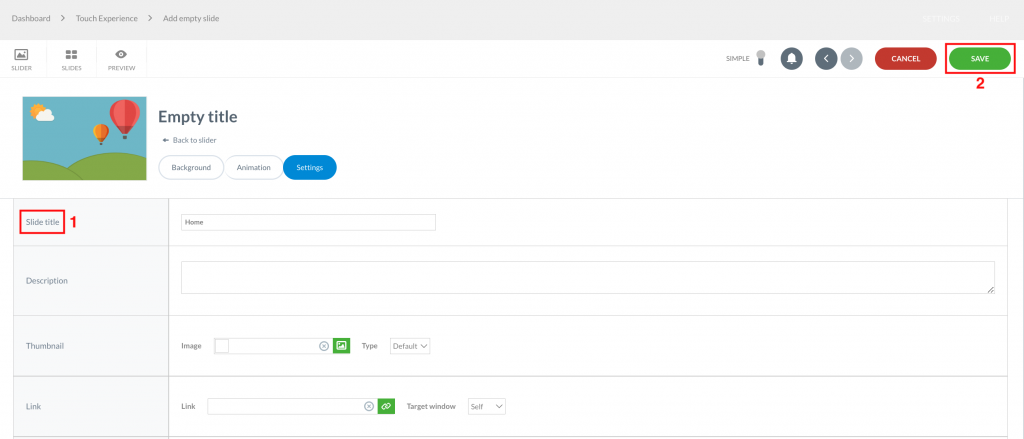
Now you are inside the Empty Slide and need to give it a title to quickly understand that is the main menu of your experience.
Click on the pencil icon next Title and insert the name you prefer (1). In this case we use Home.
Then click on Save (2).
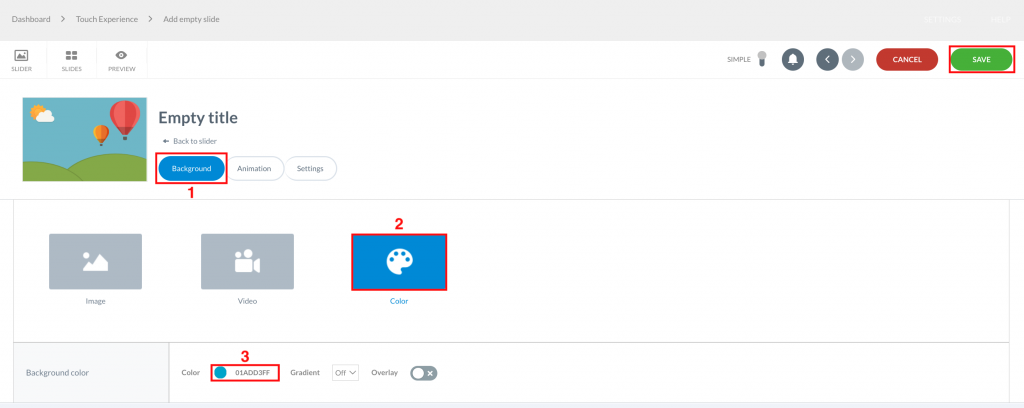
Let’s go ahead with the choice of the background.
Click on Background (1) and choose a color, an image or a video that you like.
In this case, we opt for a Color (2).
For more information about the empty Slide with elements, read the guide Create an empty Slider.
Once you choose the background, click on Save (3).
At this point, we can start to create buttons. Before starting create the Canvas view, not Content.
Click on + and then on Button (as shown in the video below)
Once the button appears in the canvas, click on it. In this way, it appears the menu with all the button configuration settings.
Let’s see in details all the function available in the configuration menu.
In the Layer tab you can:
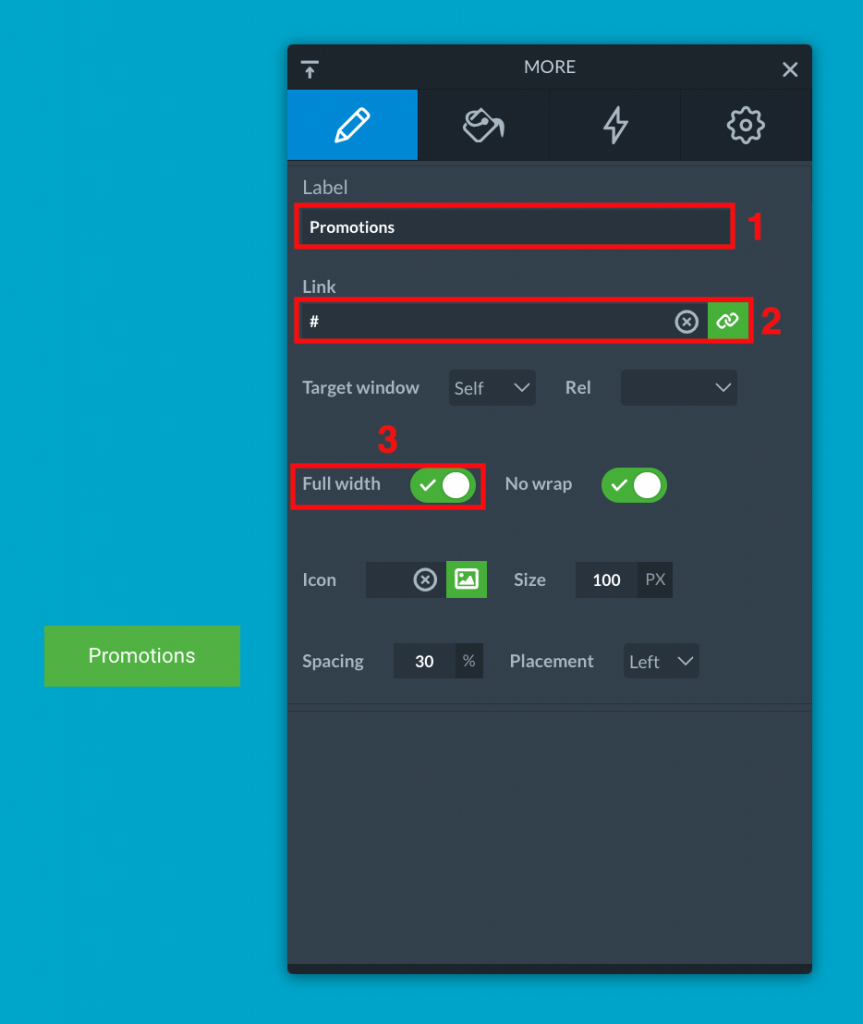
- Define the Call-to-Action (1) (Learn more, contact us ect.)
- Create the link between Slide and button (2) as we will see later.
Tip: we recommend you to enable also Full Width (3). In this way, you can edit the button width regardless of the font size and text lenght. It’s useful to design buttons all the same.
Once you do that, enable the Expert mode using the switch.

In the Design tab you can:
- Edit the Family font (1), its Color (2), the Size (3) and the Text Align (4).
- Edit the button Background Color (5) and the Border Radius (6) to round the corners.
- Edit the button size using Padding (7).

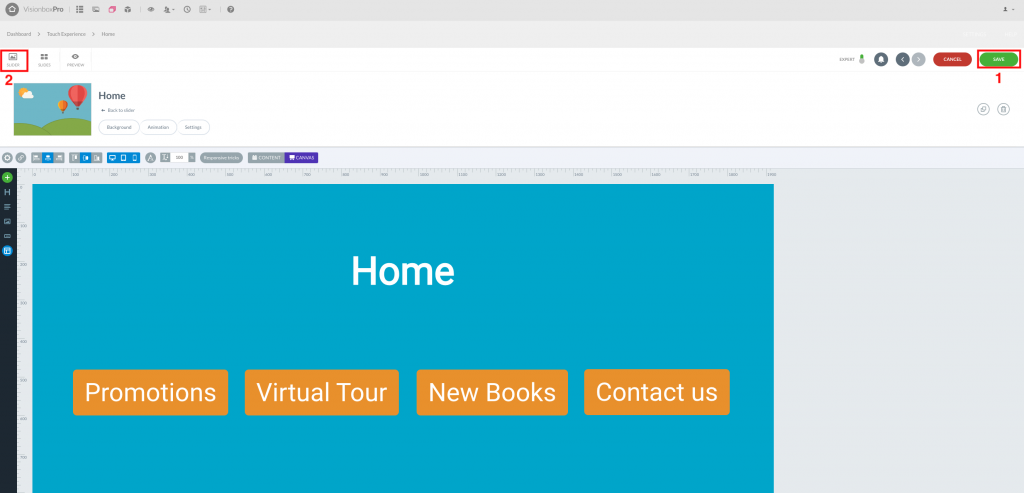
Once you end the customization, follow the same steps to create three other buttons equal to the first.
Finally, click on Save (1) and then on Slider (2) to come back to the screen where you see all the slide.
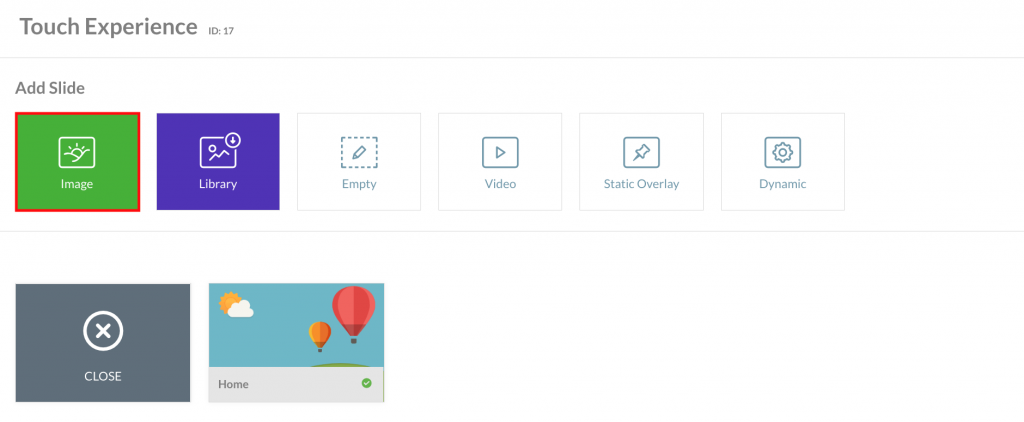
Now we can go on with the creation of the first Slide, simply composed by an image.
Click on Add Slide and then on Image.
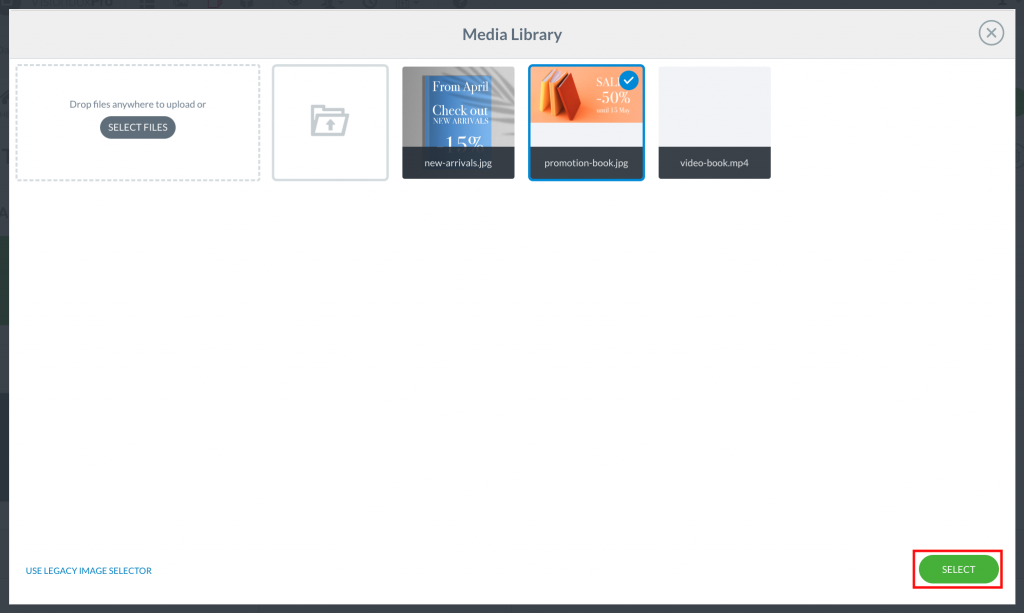
Here, choose the image that you want to publish. Remember to previously upload it in File Manager.
Click on Select to create the Slide.
Go inside the Slide clicking on Edit.
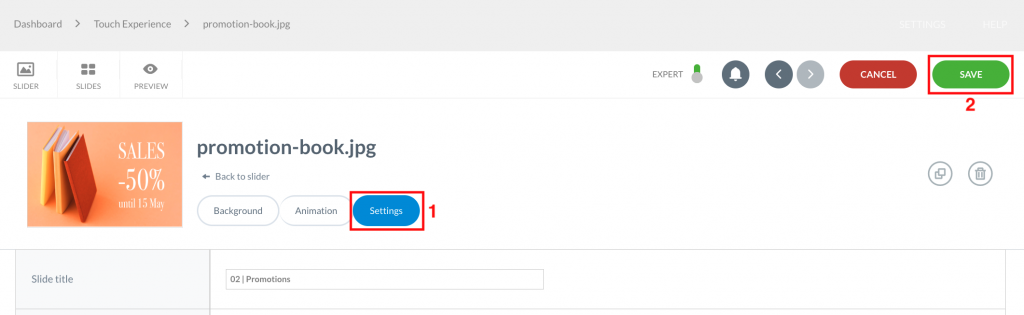
Now, click on Settings (1), rename the Slide and click on Save (2).
Tip: the numbering of the slides is consecutive. Home is number 1. We advise you to rename the other Slides in this way: 02 | Button name, 03 | Button name ect… It will be easier to create the links.
Completed this step, click on Slider and then on Home slide.
Here, select the button that you want to link to Slide 2.
In Layer tab click on the link icon.
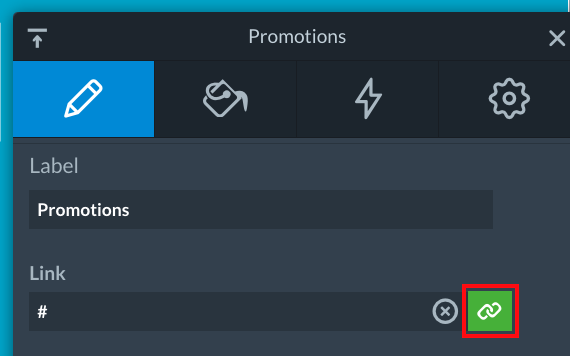
In the pop-up that appears click on Action and then on Go to Slide.
In the field Slide index insert the number of the Slide you want to link to the button (for example 2) and at last click on Insert.
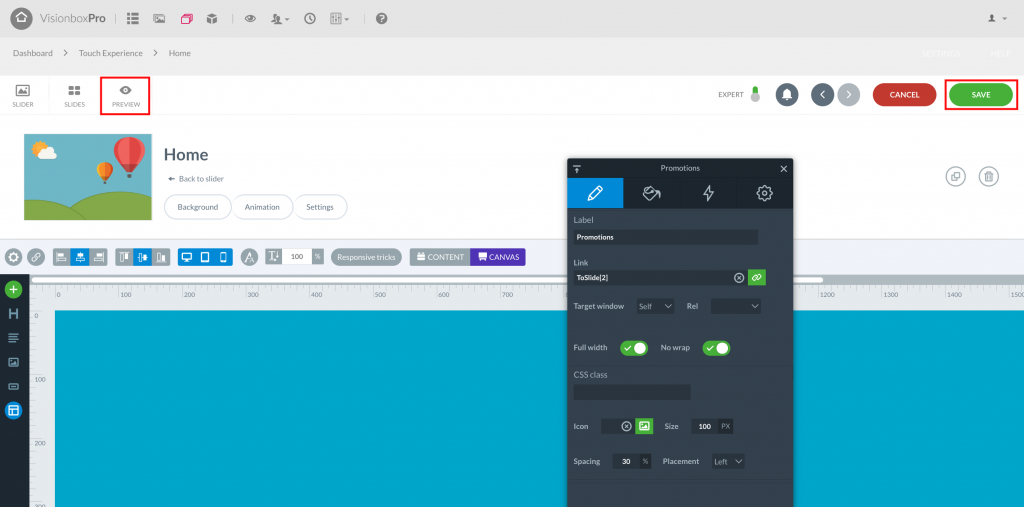
Check if the link effectively work clicking on Preview and testing it. If all works correctly, click on Save.
At this point we can go on with the creation of the other Slide.
Click on Slider and go back to the previous screen.
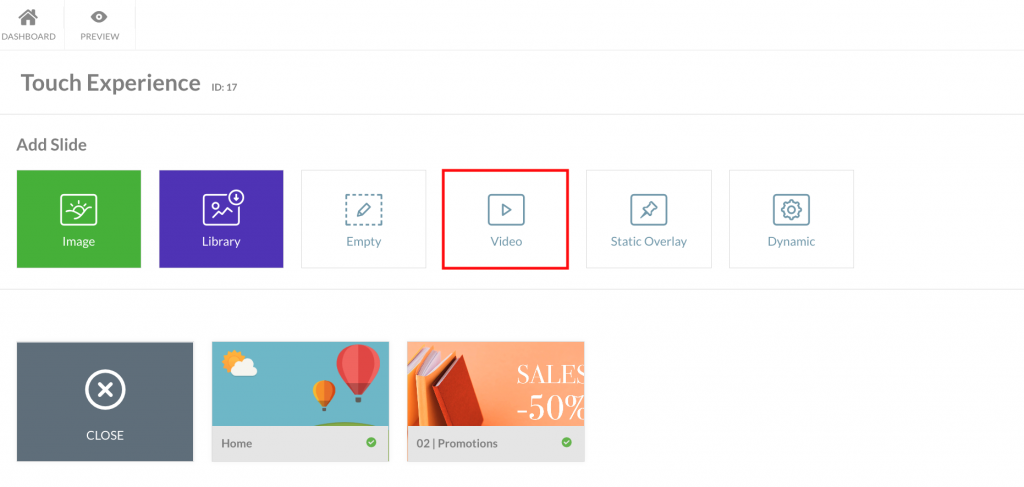
Click on Add Slide and then on Video.
In the pop-up, click on File (1) and the in the icon highlighted in the image below (2).
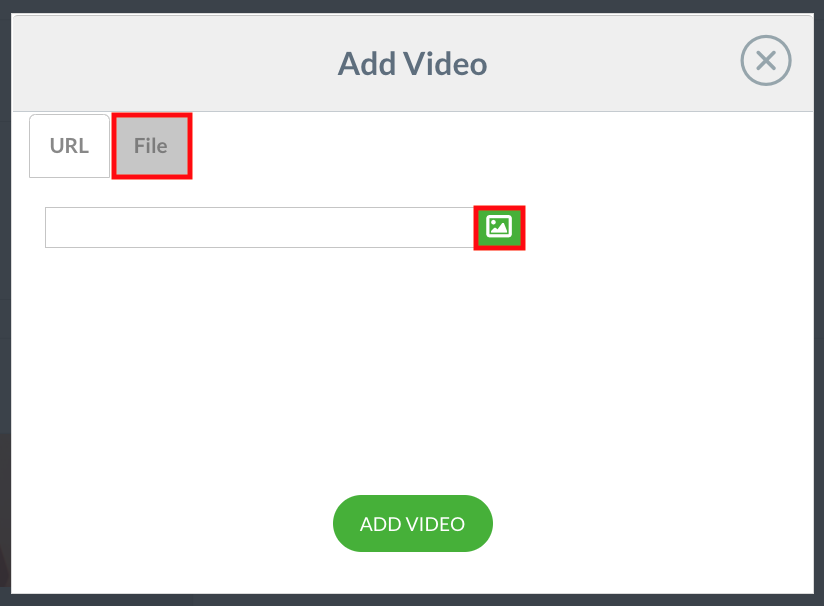
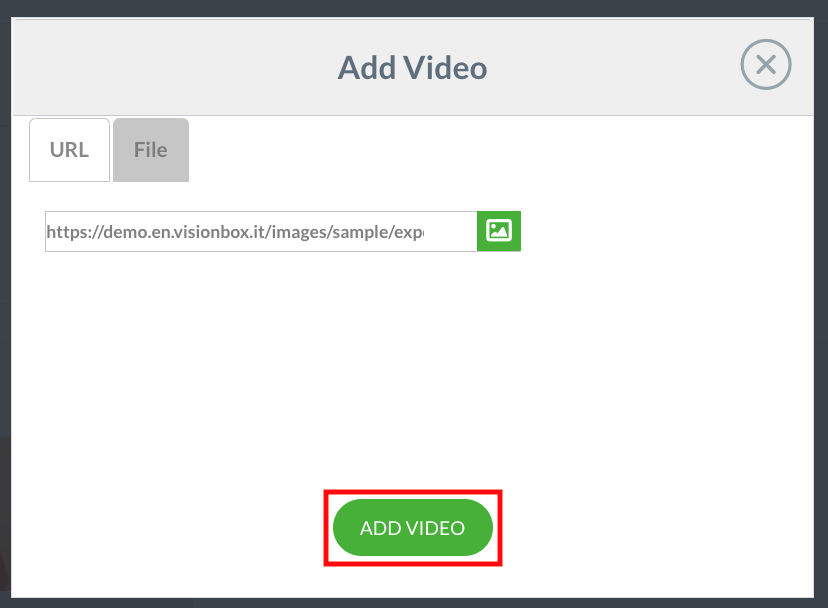
File Manager will open. Here select the video you want to insert in the Slide, click on Insert and once you return in the pop-up on Add Video.
At this point, click on Edit, go inside the Slide and rename it as you did for the previous.
After that, click on the video in the canvas.
In the Layer tab enable Autoplay (1), Reset when slide change (1) and disable Controls (2).
At last, click on Save (3) and then on Slider (4).

Now, go inside the Home slide to link a button to the newly created Video slide.
Just follows the procedure used for the first Image slide.
- Select the button you want to link to the Slide 3
- In the Layer tab click on the link icon, then on Action and finally on Go to the Slide
- Complete Slide index with the number of the Slide you want to link and click on Insert
Now let’s see how to create another kind of link. The Lightbox.
Remain in the Home slide and select one of unlink buttons.
As we see prevoiusly, click on the link icon.
In the pop-up, instead of Action, select Lightbox.
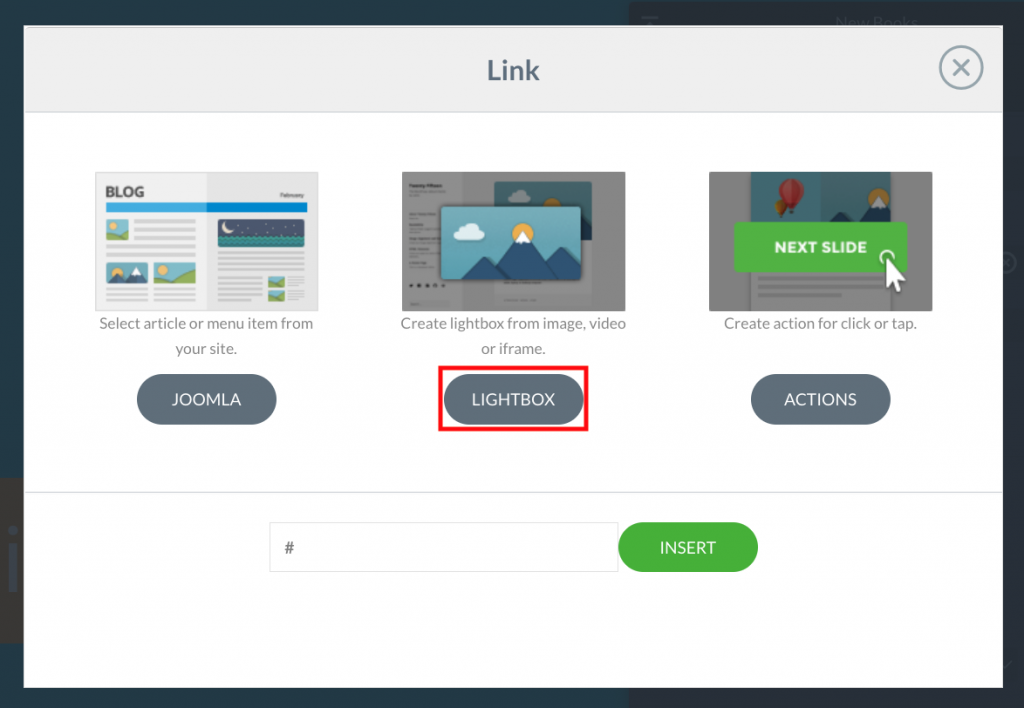
In the next window you can decide what content insert here. Image, video or iframe. In this case, we opt for an image.
Click on Choose Images and in the File Manager select the one you prefer. Finally, click on Insert.
Note: you haven’t to set the Autoplay duration. To end the view, the user just need to click outside the lightbox.
As always, we advise you to check that the link works properly in the Preview before click on Save.
To the last button we link an Empty Slide.
Click on Slider and the page where you see all the slides click on Add Slide and on Empty.
Click here to go to the guide that explain how to create an Empty Slide.
Once you have created this Slide, come back to the Home slide and select the button to link with it.
The procedure is always the same. In Layer tab click on the link icon. After that click on Action and on Go to the Slide.
In Slide index insert the number 4 and at last click on Insert.
Finally check the result on Preview and Save all the changes.
Get to this point, you have to do just one last procedure: inserting in Slides a button that allow users to come back to the Home Slide.
You have to follow the steps explain below for each Slide which is link to Home.
Go inside the Slide.
Click on

and then on Icon.

In the field Icon of the Layer tab choose the symbol and the color you prefer.
Tip: we recommend you to choose an icon that allow the user to immediately recognize its function.
After that, link the icon to the slide Home.
- In the Layer tab click on the link icon, then on Action and finally on Go to the Slide
- Complete Slide index with the number of the Slide you want to link and click on Insert
Now all that remains is to drag the icon in the right position, check that work properly in Preview and then click on Save.
Once you have repeat the procedure in all the slides, come back in the Slider and check the final results. It should be more or less like the video shown below. If so, click on Save.