Let’s configure it!
Before you start configuring your instantPlay Web, it’s worth mentioning that every time you open the configuration page, the monitor will stop displaying the web page, showing Chrome in configuration mode. To display the content again, simply save the new settings and wait for the player to restart by closing the tab of the configuration page.
1. Open your PC browser and type http://instantplayweb.local in the top bar
2. At this point, the instantPlay Web initial configuration page will appear. Here’s how to fill in the various parameters.
You may be asked for your username and password to access the configuration page. Either way, it’s adminNETWORK SETTINGS section
Ethernet
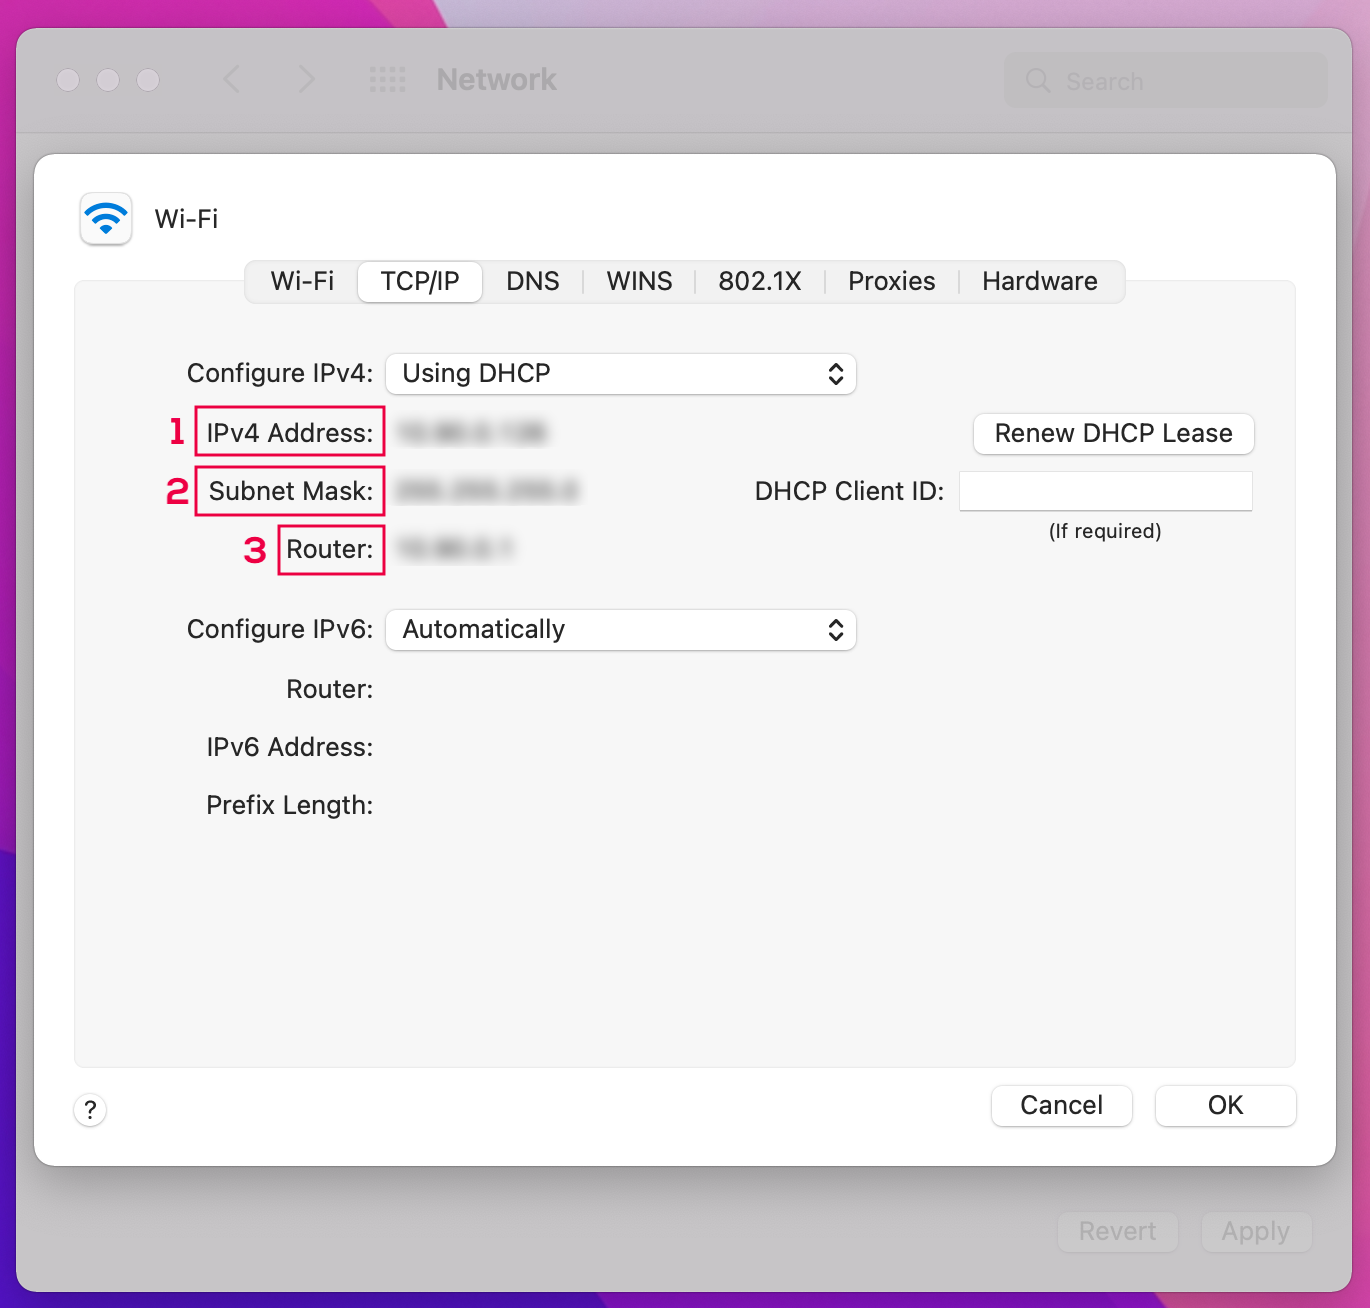
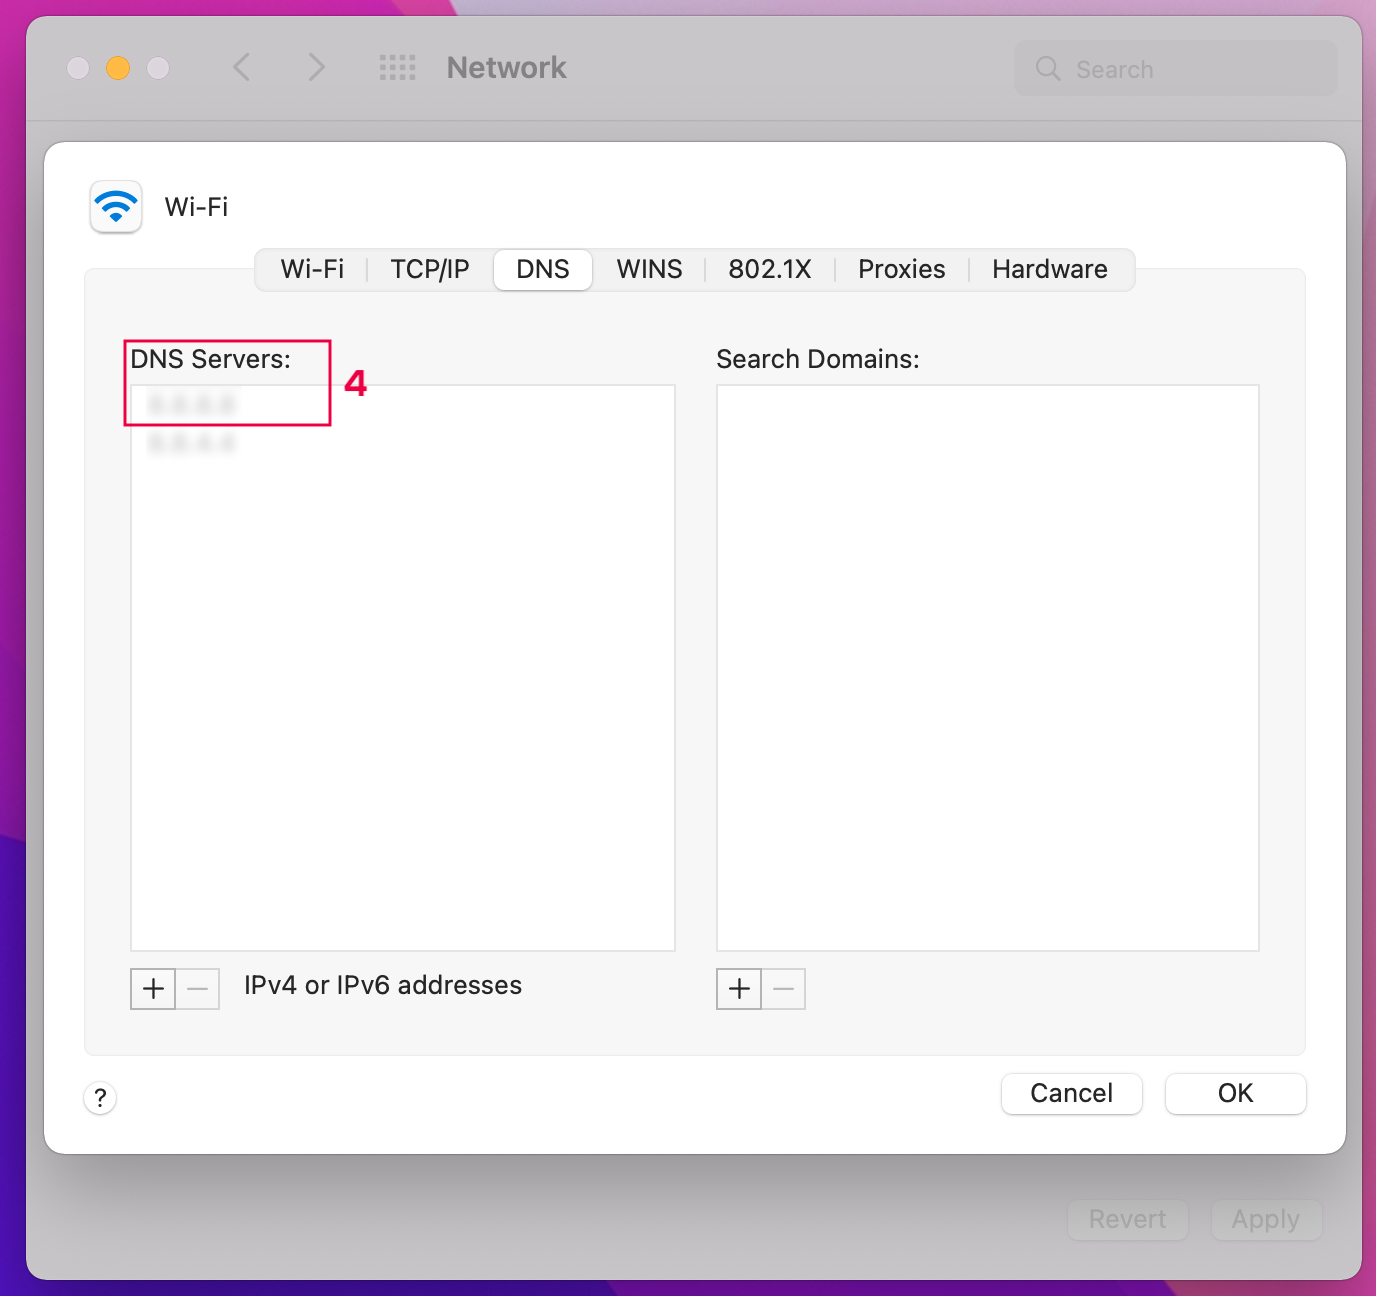
 If you’re using a Mac, the fastest way to find your IP address is to open the Network Preferences menu and select the network you’re using. Now click on the Advanced button and then select the TCP/IP tab. Here you’ll find IP (1), Subnet Mask (2), Gateway (3). To locate the DNS simply open the DNS tab and thenthen copy and paste the server address (4)..
 If you decide to use automatic DHCP instead,click on the button and when the pop-up opens clickConfirm.
 Either way, at this point you’ll see a countdown appear on the configuration page while the monitor restarts, showing in sequence: start screen (with the logo), black screen with IP and finally the browser.
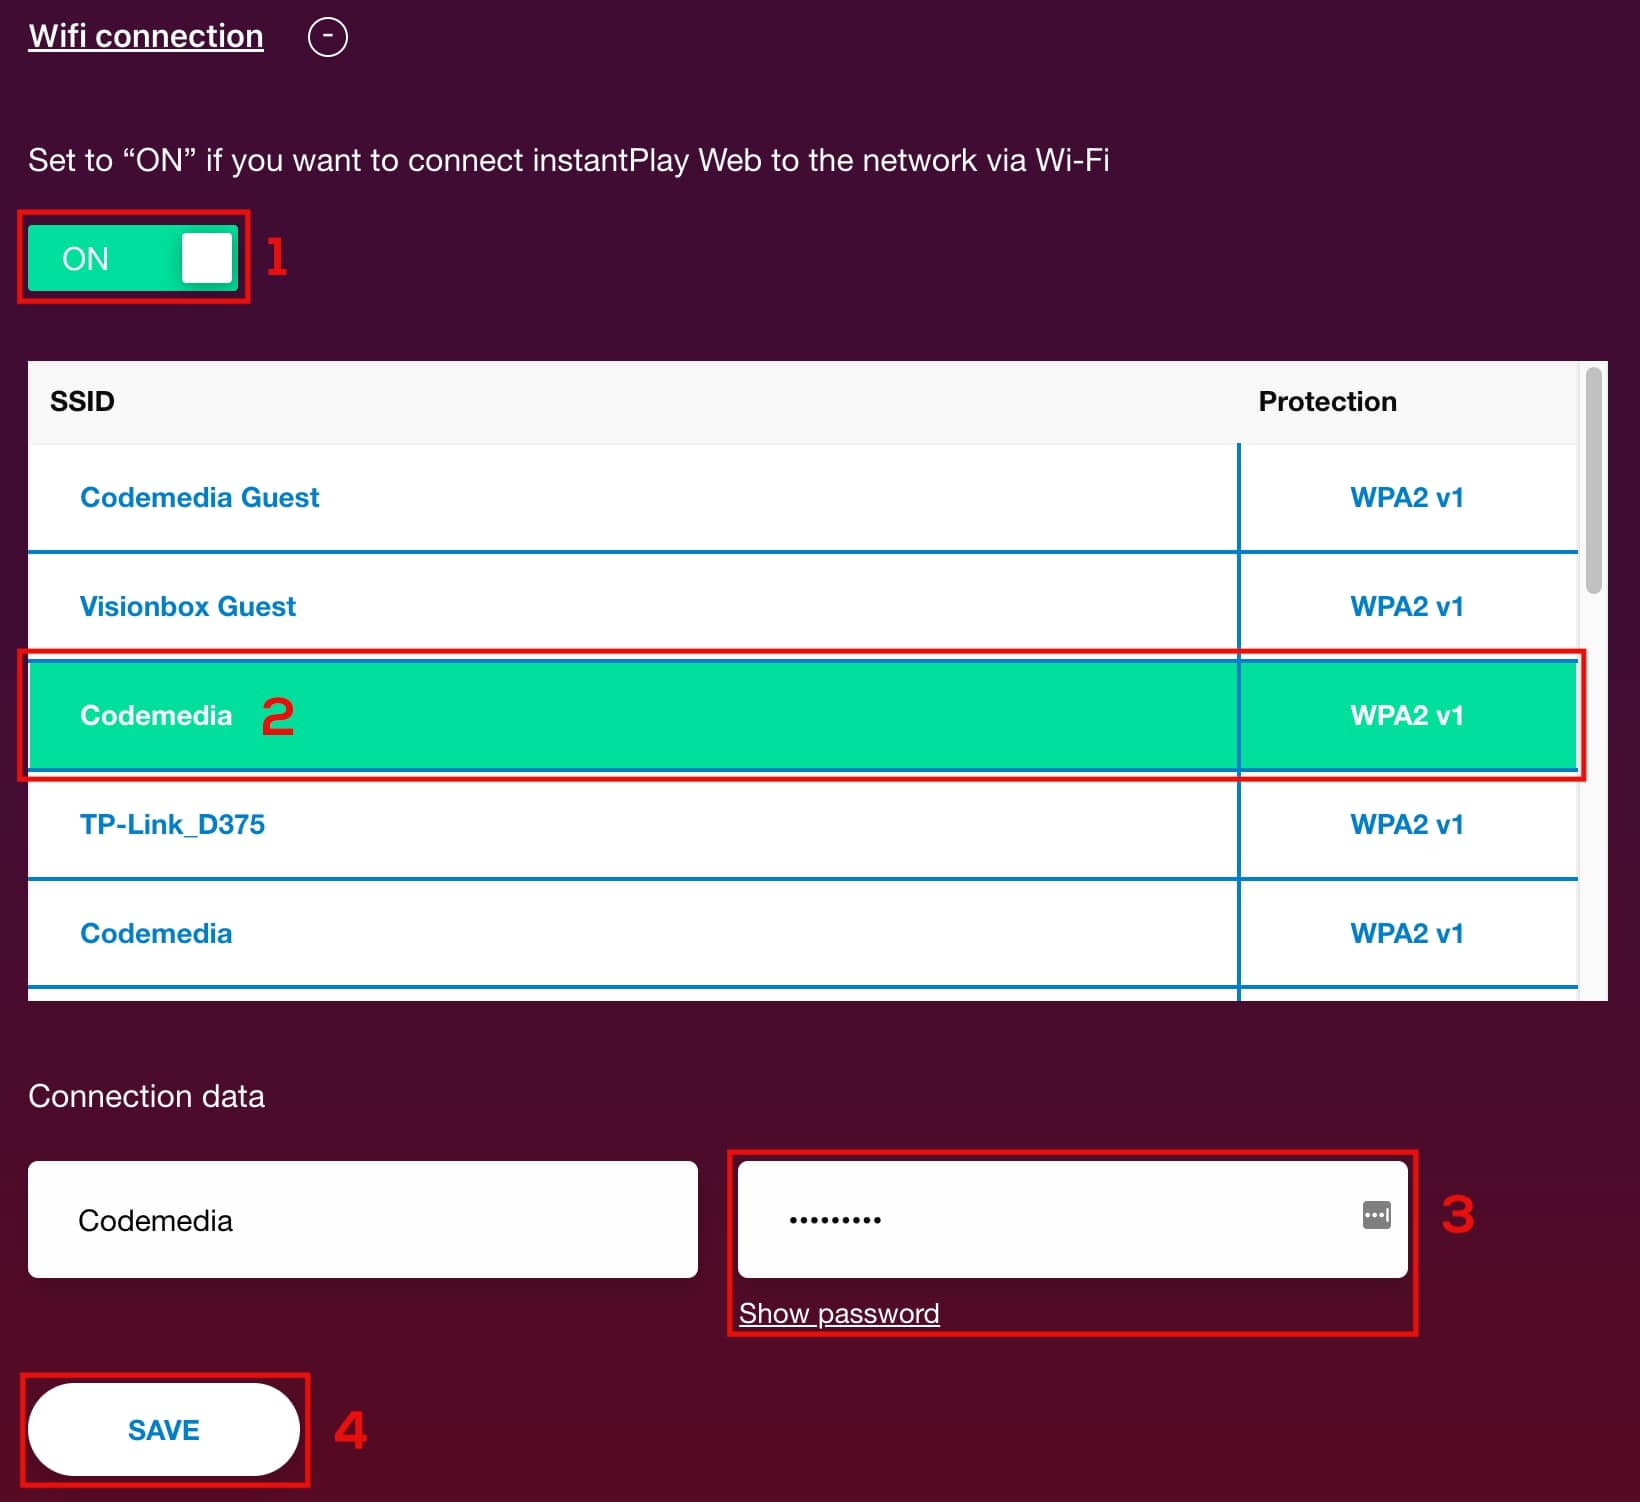
WiFi
DEVICE SETTINGS section
Once you’re connected to the internet, it’s time to move on to configuring the content. Enter the URL you want to display on the monitor in the Web resource’s URL (1). We recommend leaving theCompatibility view (2) set to ON because it keeps a Chrome extension running that optimises the contents of the iframe displayed on the monitor. Disabling it may result in display errors. The Mouse Pointer switch (3) lets you decide whether or not to keep the cursor visible. When is it useful to enable it? SIf you want to change the portion of the web page shown on the screen. This way you’re free to view whichever one you prefer. Once the change is complete, simply disable this option to hide the pointer. The Reload web page after (5) field, n the other hand, makes the web page refresh periodically. Simply enter the desired time interval (in seconds). Finally, the field Reset browser after field (4) lets you decide how many minutes of inactivity elapse before instantPlay Web resets to the device’s default settings.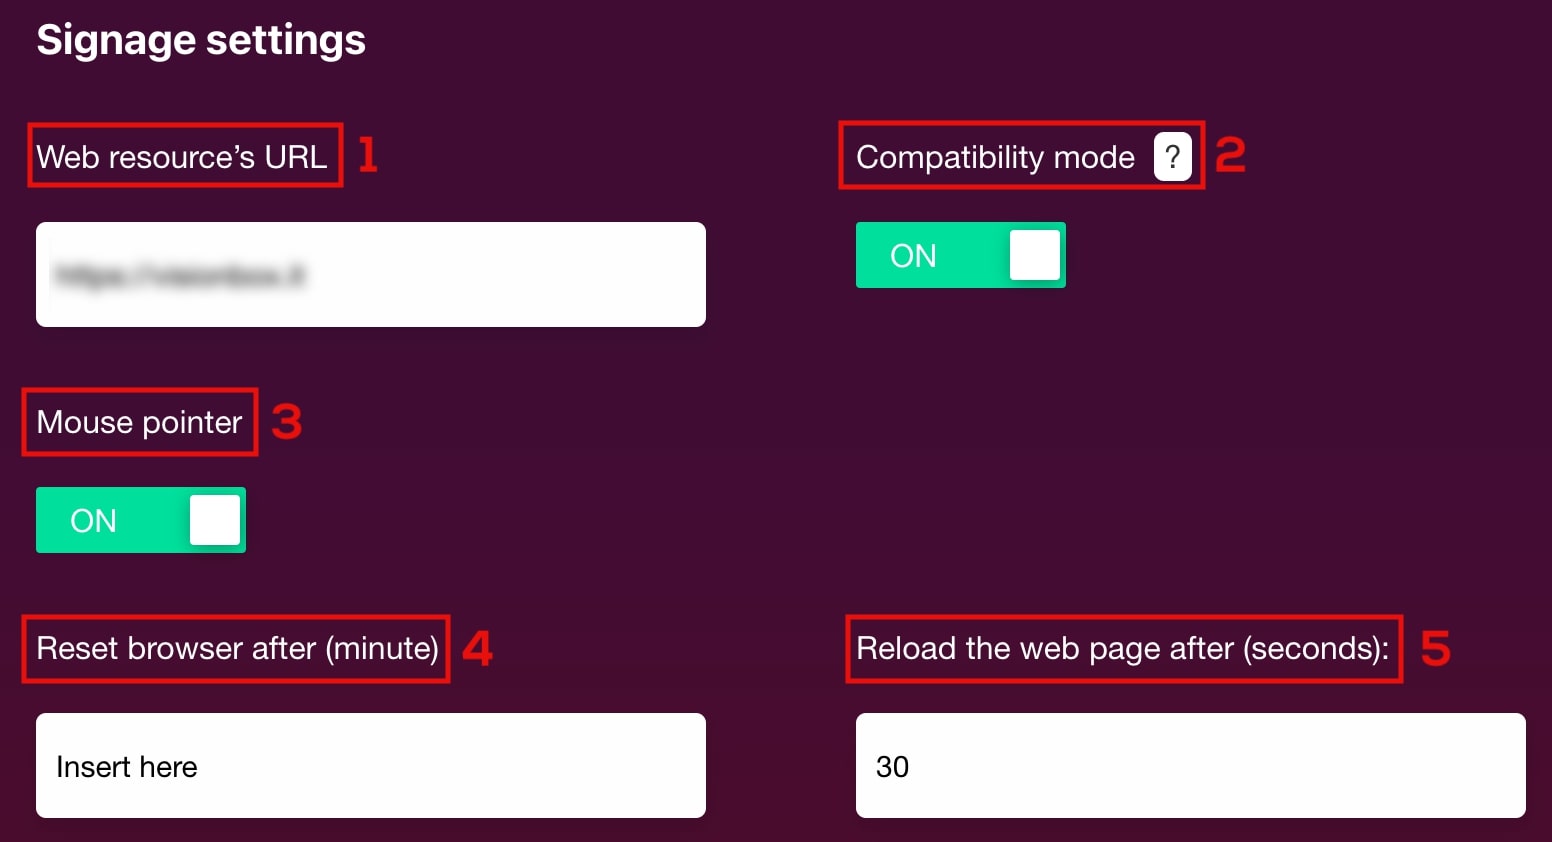
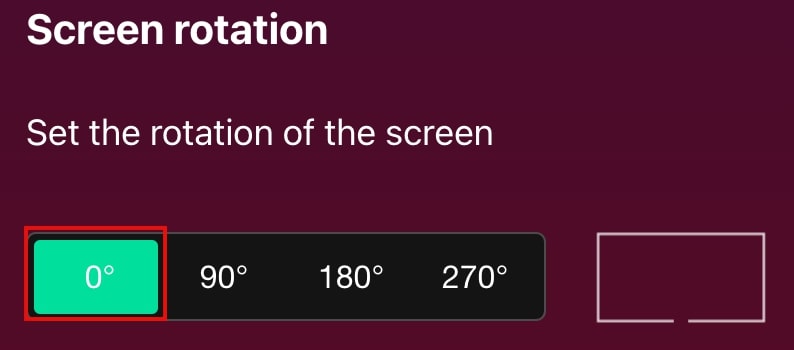
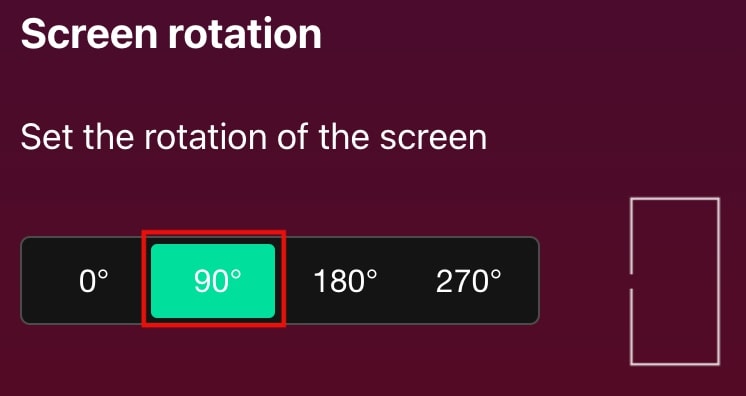
Monitor orientation
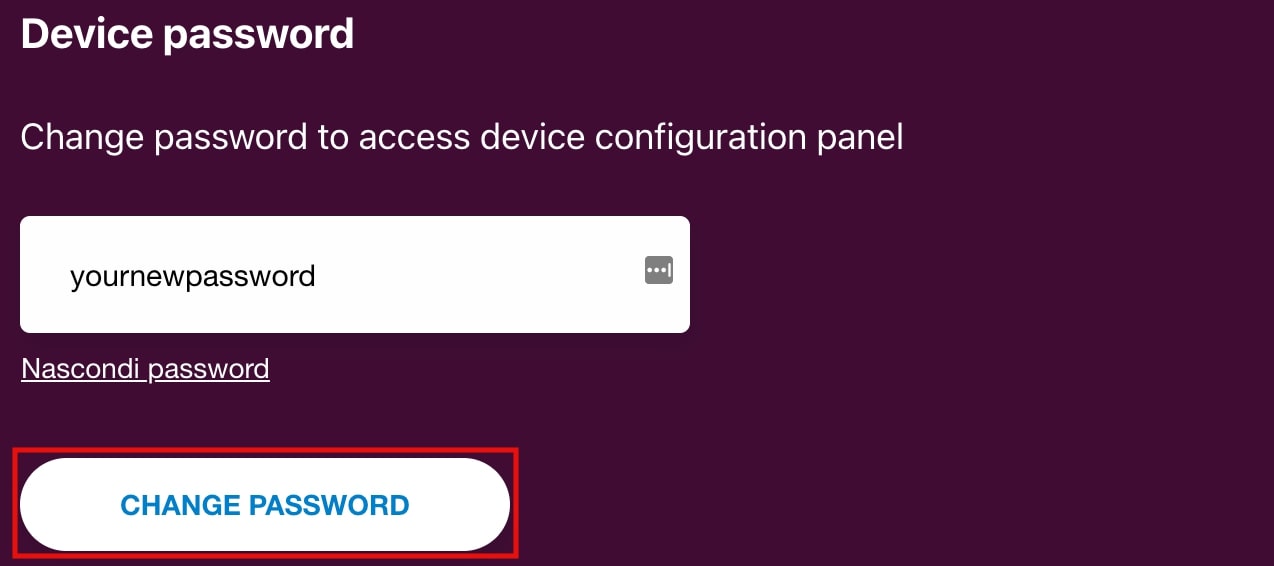
Device password
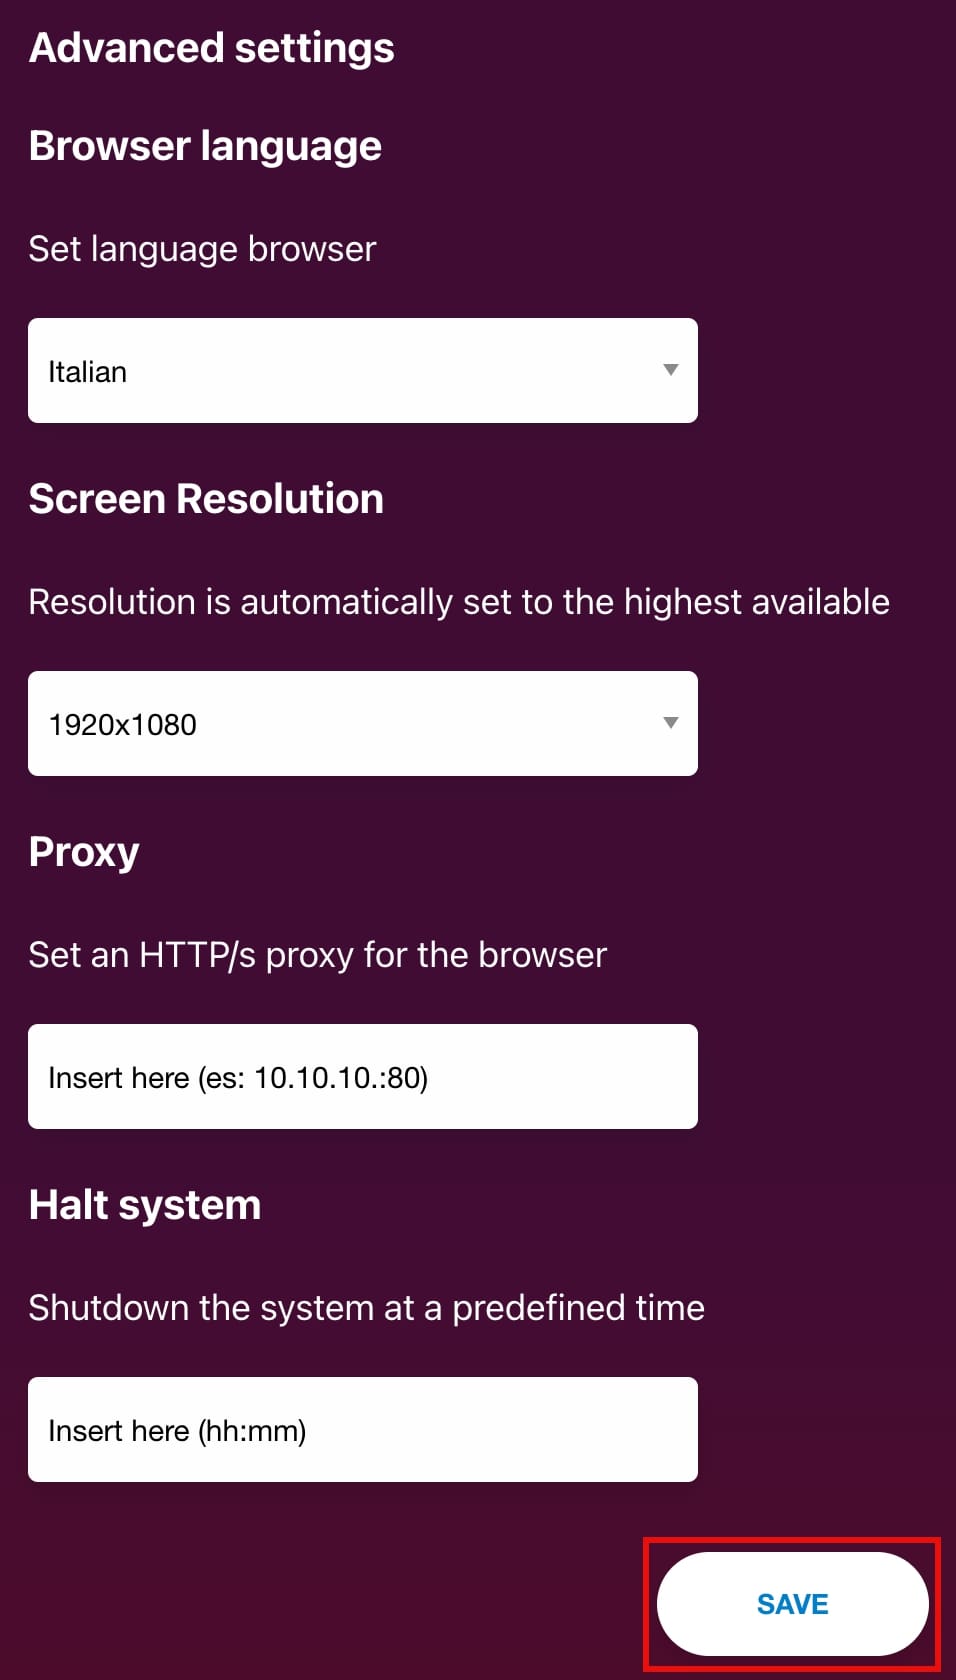
ADVANCED SETTINGS section
In this section you can:-
-
- change the browser language.
- change the screen resolution by choosing from those available.
- set the proxy for the browser.
- schedule the monitor shutdown so that it turns off at the same time every day.
-
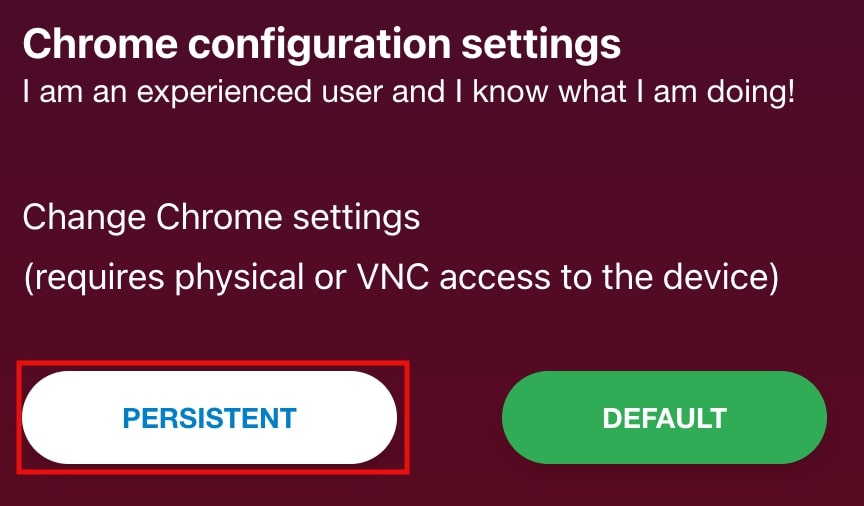
Chrome configuration settings
-
-
- Download VNC Viewer.
- Install and launch it.
- In the search bar “Enter a VNC Server address or search…”, enter the IP of your instantPlay Web. At this point VNC will ask for permission to access the address you entered. Allow it.
- In a few seconds you will have access to the browser displayed on the monitor and can make all the changes you want.
-